

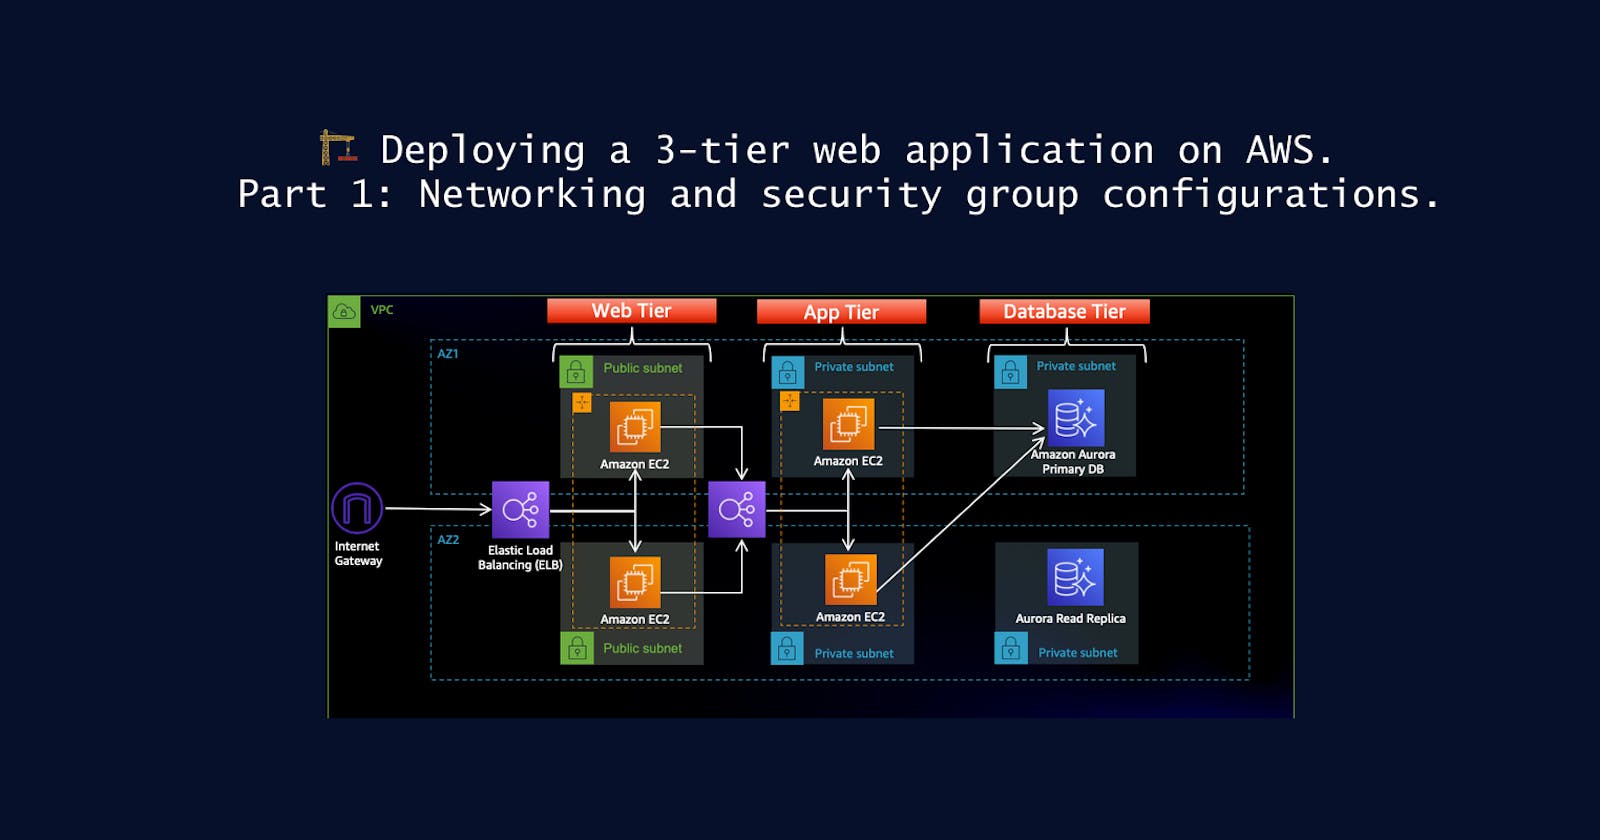
🏗️ Deploying a 3-tier web application on AWS. Part 1: Networking and security group configurations.


📍 Introduction
Hey there, amazing readers! 🎉 Get ready to dive into the fantastic world of AWS as we embark on an exhilarating project together! We'll be deploying a super cool 3-tier web application on AWS, and trust me, it's going to be a blast! 😄
The project will unfold in four exciting parts which are as follows:
Deploying applications and implementing CI/CD.
Setting up scaling and monitoring.
Creating infrastructure using Cloud Formation.
✔️ Setting up networking infrastructure
First, we will set up our networking infrastructure by creating the following resources:
VPC: Virtual private cloud for isolating our project.
Private subnet: This is where our ec2 servers will reside.
Internet gateway: This will enable resources in the public subnet to access the internet and be accessible to the outside world.
NAT Gateway: This will allow our ec2 instances in the private subnet to access the internet so that we can download our source code into those machines.
Routing table: In the routing table, we will define the routes that network traffic within our subnets will follow to reach the external world, either through the internet gateway or the NAT gateway.
🔸 Task 1: Creating a VPC for the project
Follow the below steps to create a VPC for the project:
Go to the VPC dashboard and click on Create VPC.

Give a name for your VPC and put
10.0.0.0/24as the IPv4 CIDR range.
Leave other settings as default and click on
Create VPC.
🔸 Task 2: Creating subnets
Now we will be creating subnets to deploy our application and databases.
The IPv4 subnet CIDR block will be as follows:
public-subnet-az-1      : 10.0.0.0/27
public-subnet-az-2      : 10.0.0.32/27
private-subnet-az-1     : 10.0.0.64/27
private-subnet-az-2     : 10.0.0.96/27
private-db-subnet-az-1  : 10.0.0.128/27
private-db-subnet-az-2  : 10.0.0.160/27
Go to the subnet dashboard and click on Create Subnet.
Select the newly created VPC.

Now we will create 6 subnets, one of which is as follows:
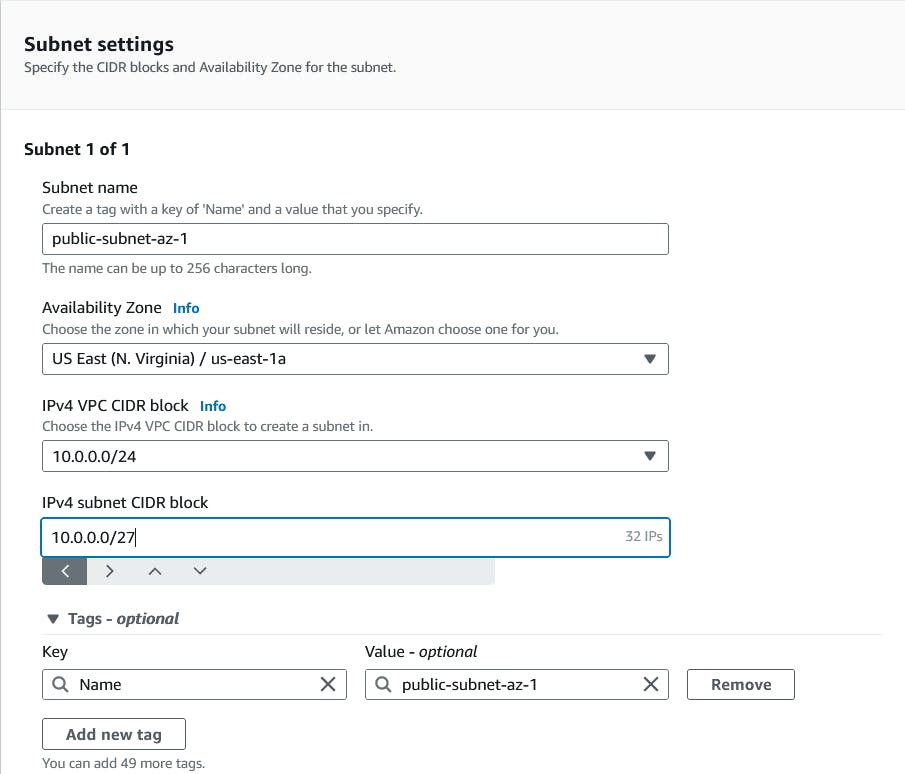
For az-1 subnets select availability zone as us-east-1a and for az-2 subnets select availability zone as us-east-1b.
Now after creating 6 subnets click on Create subnets.

After some time the subnets will be created.

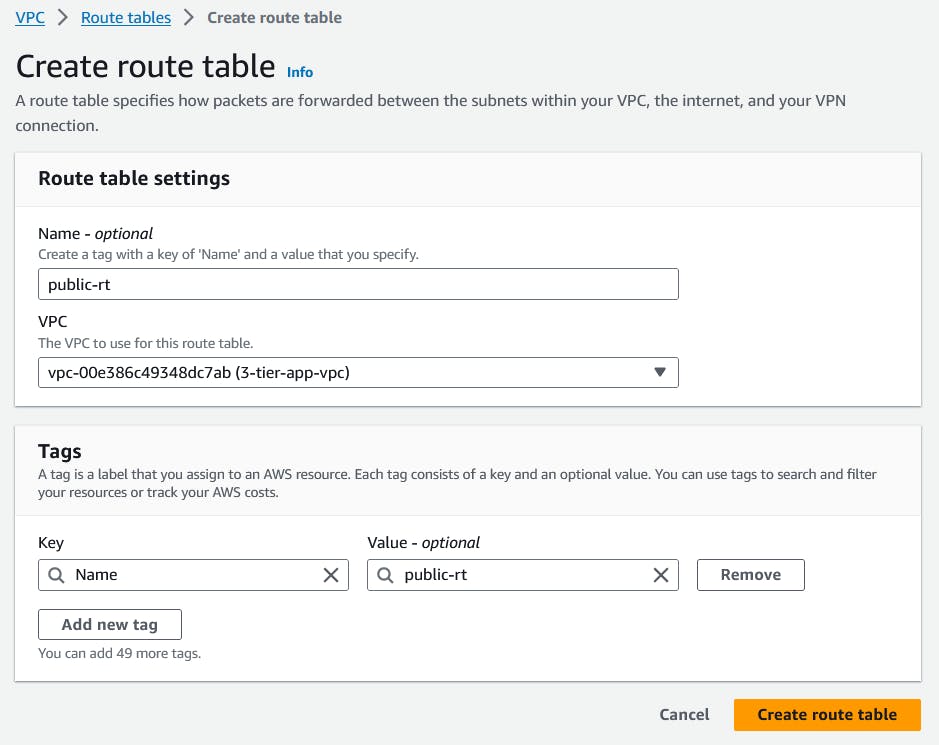
🔸 Task 3: Creating a route table
Now we will be creating a route table so that the internet traffic within our VPC can be routed to the correct destinations. In this task, we will be creating 3 route tables.
Go to route tables in the VPC dashboard and click on Create route table.
Now that our route table is created we need to associate our subnets to the route table.

Now go to the subnet associations and click on Edit subnet associations.
Add the public subnets and click on Save associations.

Likewise, create
private-rt-az-1(associate private-subnet-az-1 to it ) then createprivate-rt-az-2(associate private-subnet-az-2 to it).After this, we will have 4 route tables in our VPC.
🔸 Task 4: Creating NAT gateway
To make our instances in private subnets reach the internet we will create 2 NAT gateways one for each private route table.
Go to the NAT gateway dashboard in VPC and click on Create NAT gateway.
Set a name for the NAT gateway and select public-subnet-az-1 as the subnet. Then click on Allocate Elastic IP.
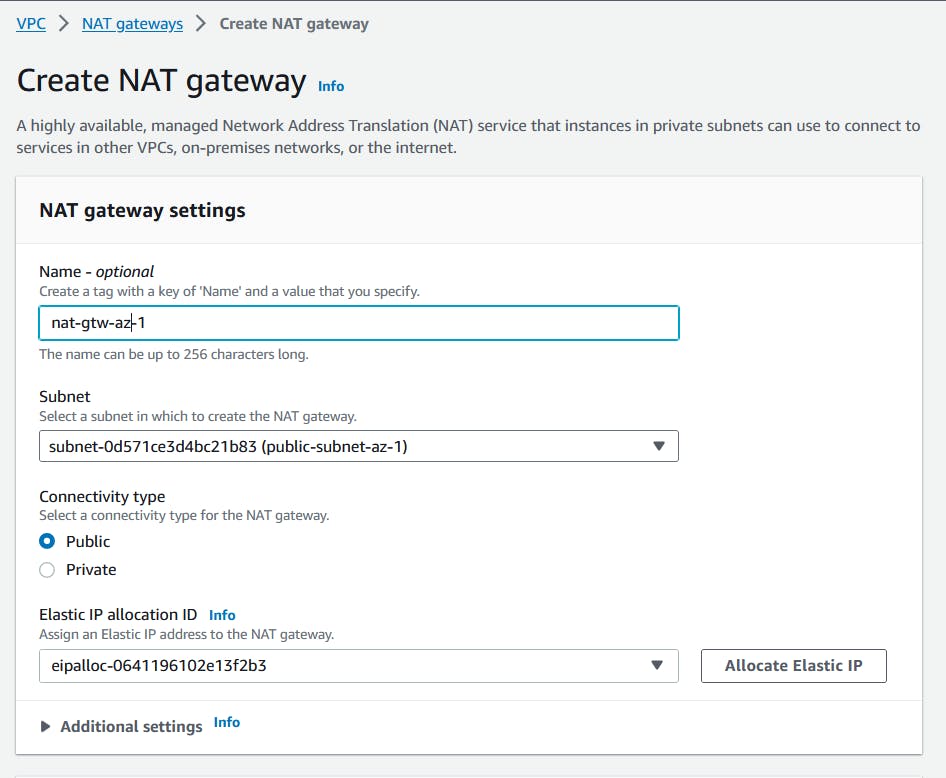
After that click on Create NAT gateway.
Likewise, create
nat-gtw-az-2withpublic-subnet-az-2as the subnet.
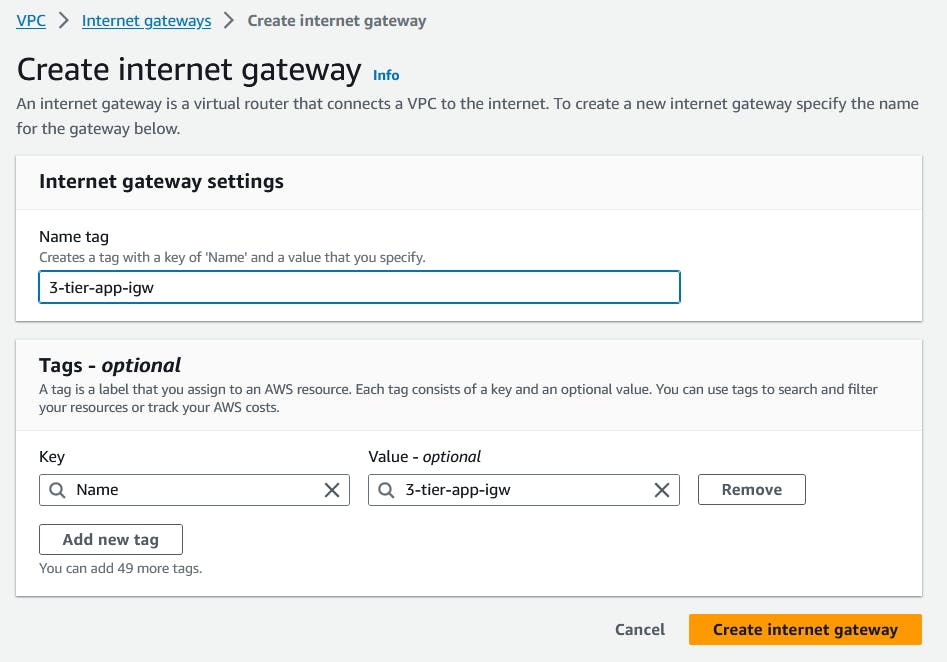
🔸 Task 5: Creating an internet gateway
An internet gateway enables internal traffic within a VPC to access the internet.
Go to the VPC dashboard and Internet gateways.
Give a name for your internet gateway. Then click on Create Internet Gateway.
After that our internet gateway is created we need to attach it to our VPC. Click on Attach to a VPC.
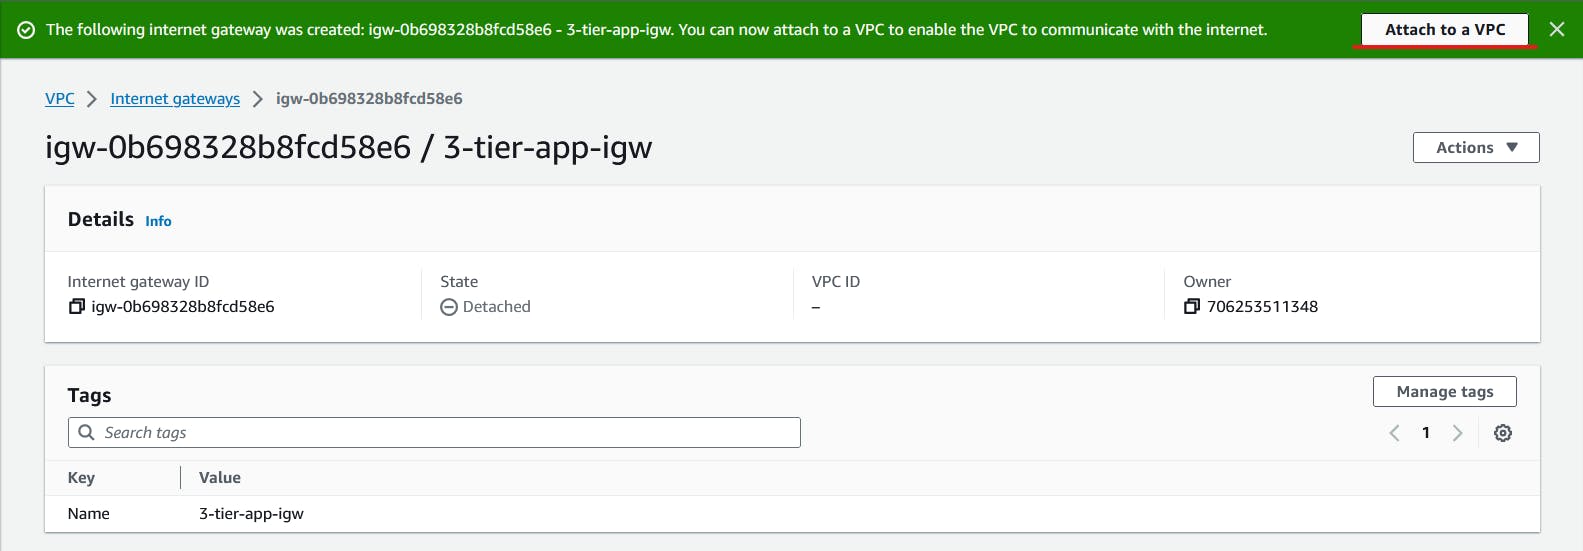
Now select our newly created VPC and click on Attach internet gateway.

🔸 Task 6: Add IGW and NAT gateway to the route table
Now, we will attach our newly created Internet Gateway and NAT Gateway to our route table, allowing resources within our subnets to access the external internet.
Adding internet gateway route to the public route table.
Go to the public-rt route table and click on Edit routes.
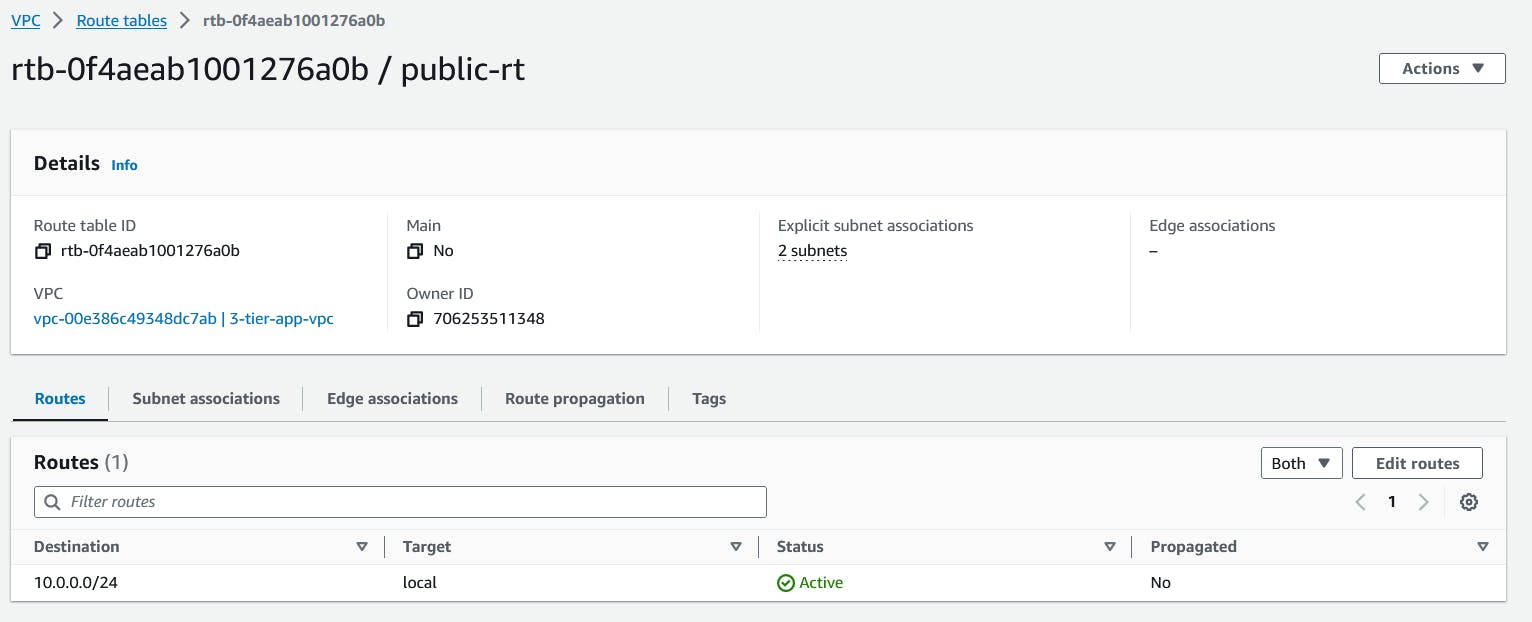
Select 0.0.0.0/0 as the destination and the internet gateway as the destination. Then click on Save changes.
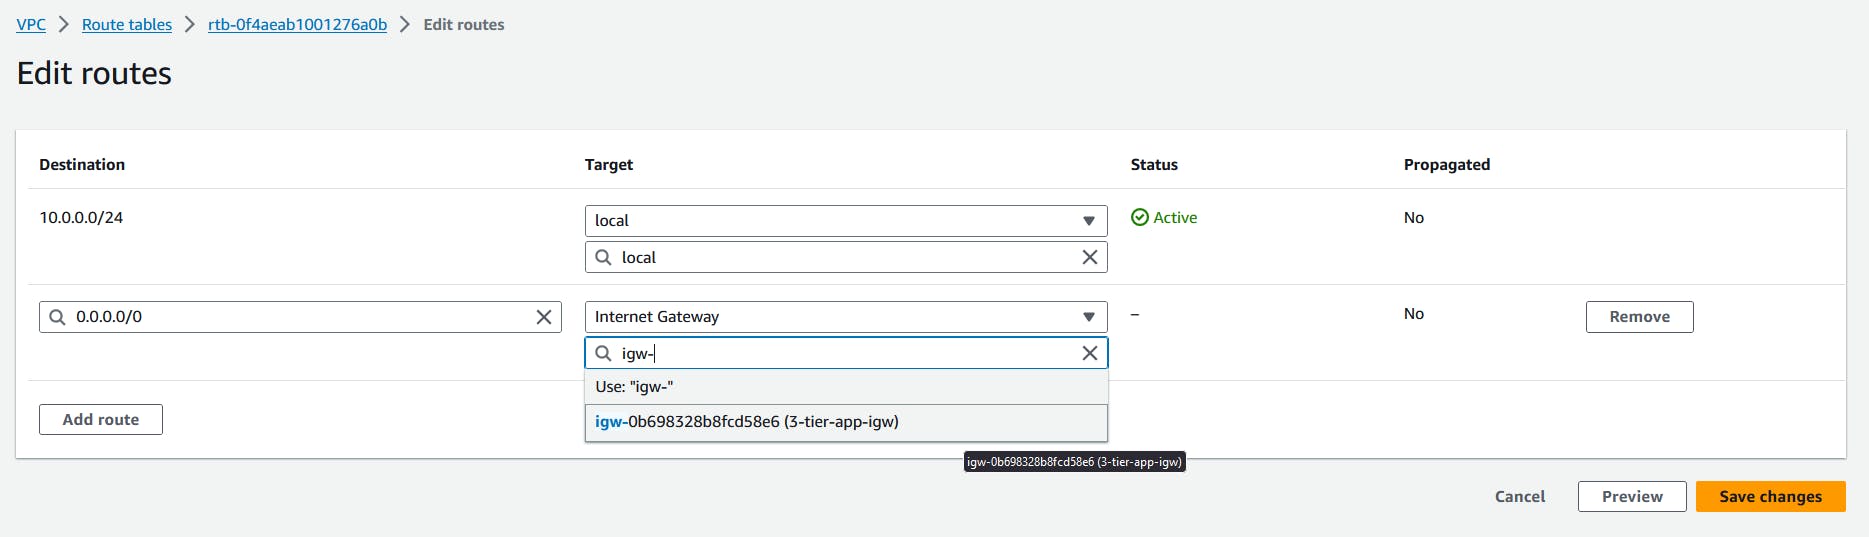
Now the internet gateway has been added to
public-rtroute table.
Adding NAT gateway to private route tables.
Go to the
private-rt-az-1route table and click on Edit routes.Select 0.0.0.0/0 as the destination and NAT gateway as the target and choose
nat-gtw-az-1. Then click on Save changes.
Likewise set
nat-gtw-az-2forprivate-rt-az-2 .
✔️ Creating security groups
Now that we have configured our networking settings, let's create security groups that will be used for ec2 instances and load balancers.
Public-facing load balancer security group.

webserver instance security group. Also, add ssh as an inbound rule.
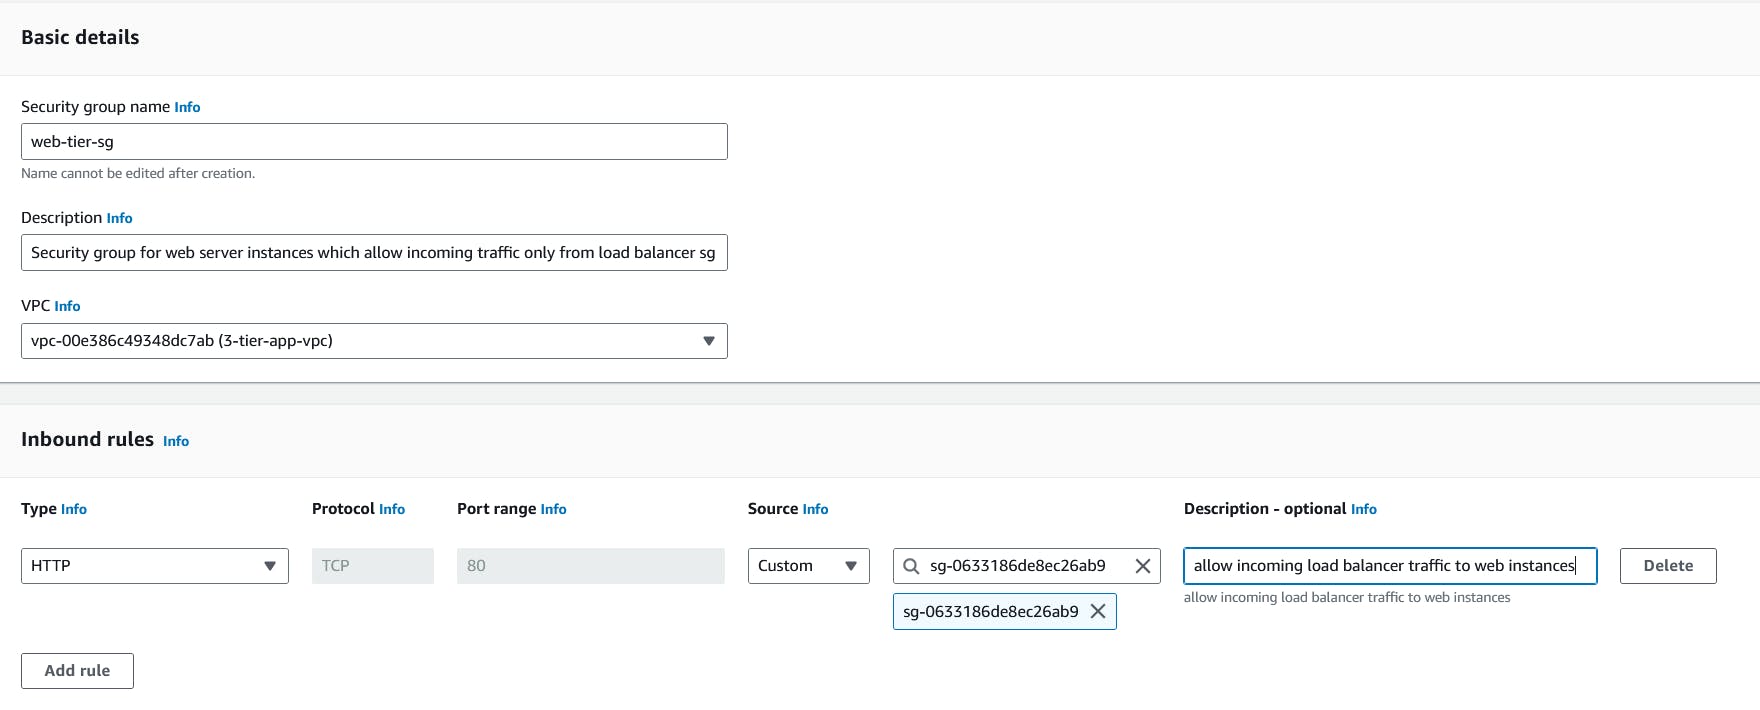
private load balancer security group. This will receive traffic from the
web-tier-sgsecurity group
app-tier instance security group. For HTTP and custom TCP with the 3000 port select source as
internal-lb-sg. Also, add ssh as an inbound rule.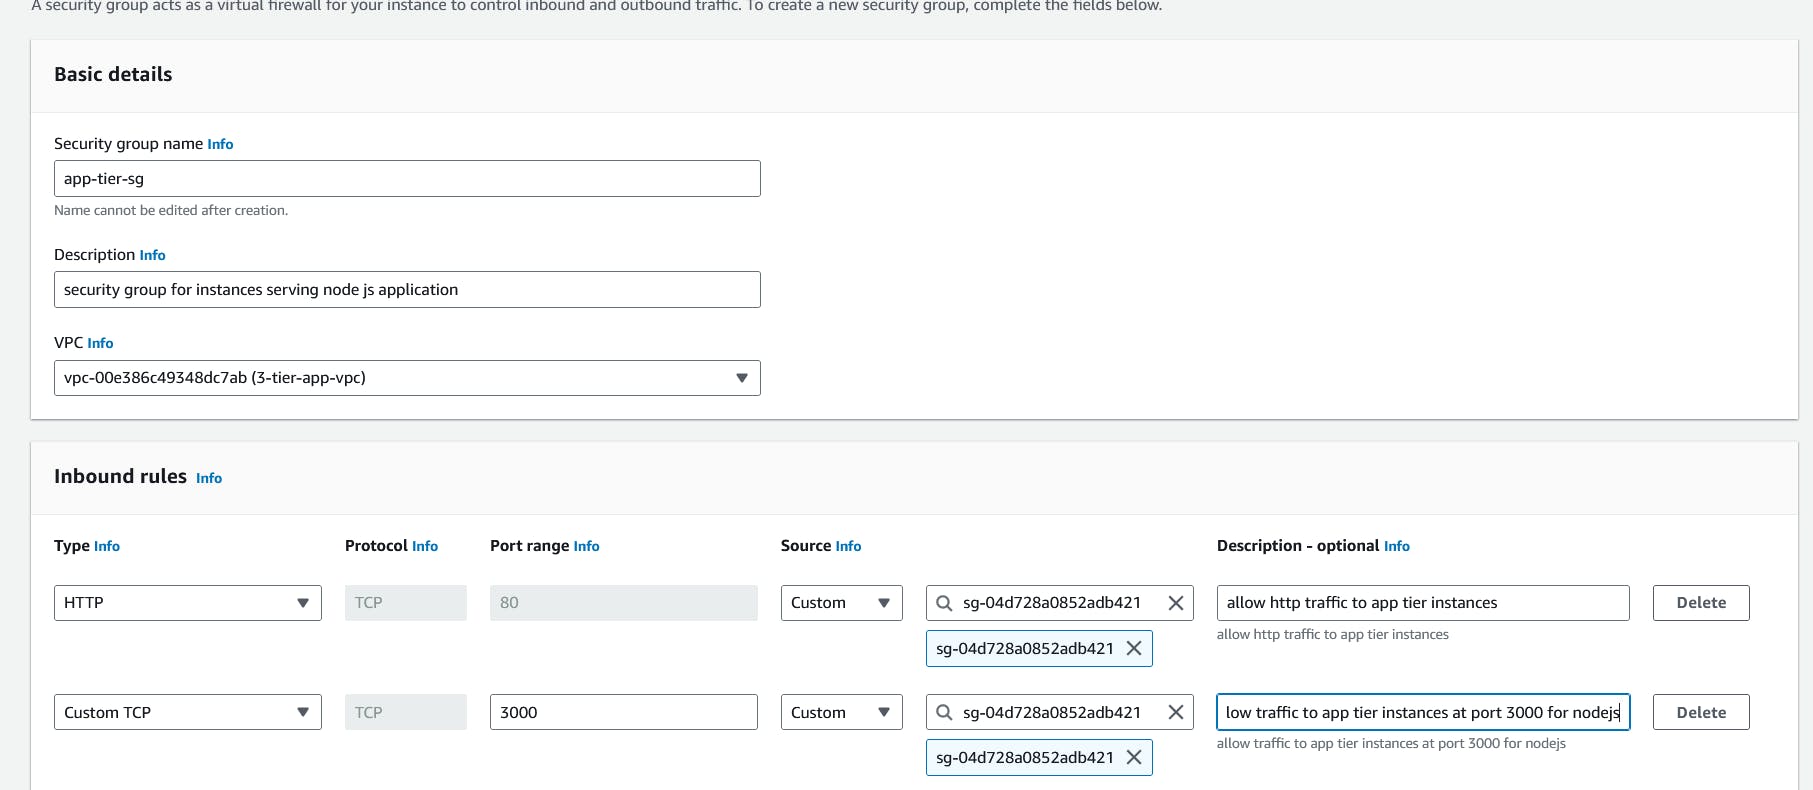
RDS database security group. This security group will receive traffic from
app-tier-sg.
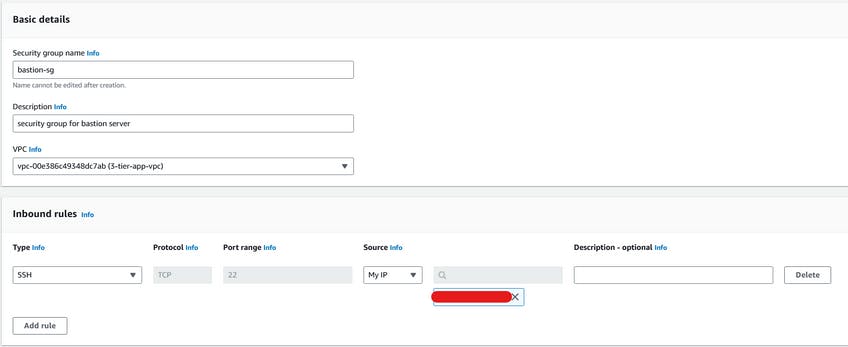
Bastion security group(this will be used for the Bastion server through which we will connect to our web and app ec2 instances. Select the source as your IP address.
📍 Conclusion
🚀 This thrilling ride will continue in Part 2 of this fantastic blog series, we'll be diving into setting up EC2 instances to power our amazing three-tier application! And that's not all - we'll also configure CI/CD for seamless, automatic deployment of our application! Stay tuned! 🎉